Upstairs Toilet Leak: How Bad Is It & What To Do Next
Upstairs toilet leak and ceiling damage downstairs? Learn what can be salvaged, when mold is a concern, and how to get clear, honest restoration estimates.
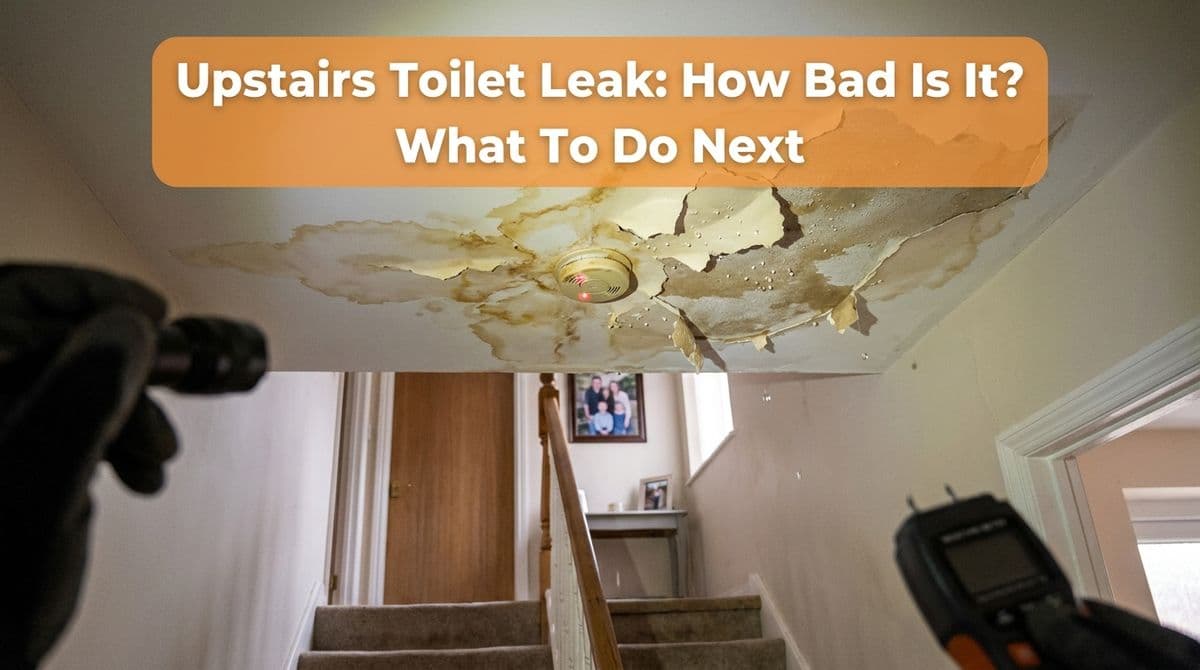
When an Upstairs Toilet Leak Turns Into a Downstairs Ceiling Problem
We recently got a call from a homeowner — let’s call her Susan — who was feeling completely overwhelmed. Her upstairs toilet’s wax ring had failed about a week earlier, and water had made its way down into the ceiling of her first floor.
By the time she reached us, Susan had already talked to several restoration companies and was getting wildly different stories: one company was pressuring her to start work immediately with no clear estimate, another quoted almost double the price, and a third started throwing around legal terms about mold assessments without explaining what actually applied to her situation.
We see this kind of confusion all the time, so we walked Susan through what was really going on, what kind of damage an upstairs toilet leak can cause, and how we would approach her home. In this post, we’ll walk you through the same explanations we shared with her.
How Much Damage Can a Broken Wax Ring Really Cause?
The wax ring is the soft seal between the base of your toilet and the flange on the floor. When it fails, every flush can send water (and sometimes waste) under the toilet and into the structure below. Because the leak is often hidden, it can go on for days before anyone notices.
Here’s how we explain situations like this to our customers when we arrive on site:
- Bathroom floor damage: Subflooring can swell, warp, or get soft and spongy around the toilet.
- Ceiling damage below: Water follows gravity, so it may stain, bubble, or collapse the ceiling directly under the bathroom.
- Wall cavities: Water can run along joists and into adjacent walls, sometimes several feet from the original leak.
In Susan’s case, the leak originated in a 5' x 8' bathroom, but the visible opening in the downstairs ceiling was only about 1' x 1'. That’s fairly small, which usually tells us the leak was either caught reasonably quickly or didn’t spread extensively. Still, we never assume — we verify with moisture meters and, if needed, small inspection holes to see how far the water really traveled.
What Should Happen First After You Discover the Leak
When homeowners call us about an upstairs toilet leak, we walk them through a basic sequence. Here’s how we typically recommend handling it:
- Stop the water source. Turn off the water supply to the toilet and avoid using it. If the wax ring is clearly failed, the toilet needs to be pulled and the ring replaced by a plumber.
- Protect what’s underneath. Place a bucket, towels, or plastic sheeting under the damaged ceiling to catch drips. Move furniture and valuables out of the way.
- Document the damage. Take clear photos and short videos of the bathroom floor, the ceiling below, any bubbling paint, and any discolored areas. We always recommend this for insurance claims and for comparing contractor estimates.
- Get a professional moisture assessment. When we come out, we don’t just look at the stain. We check the surrounding ceiling, walls, and flooring with moisture meters to see what’s wet and what’s dry.
Our goal in those first steps is simple: stop additional damage, map out the affected areas accurately, and give you a clear picture of the real scope of work so you’re not guessing.
Do You Need a Mold Assessment for a Small Ceiling Leak?
Susan was especially confused about mold. One company had brought up mold laws and mold assessment consultants; others never mentioned it at all. She had a small dark area on the ceiling and wasn’t sure if it was mold or just a stain.
Here’s how we talk about mold with our customers in similar situations:
- Time and moisture matter most. Mold generally needs 24–48 hours of consistent moisture to start growing. A one-time, quickly dried leak is lower risk than a slow leak that’s gone on for weeks.
- Testing vs. common sense. We can’t call something “mold” legally unless it’s tested, but we can absolutely tell you if something looks suspicious and should be treated as such.
- When a licensed mold assessment consultant is needed: In many states, there are specific rules. As a rule of thumb, if you have a large, clearly contaminated area or strong musty odors over a wide area, we’ll advise bringing in a licensed mold professional and we’ll coordinate with them.
For small spots like Susan’s 1' x 1' ceiling opening, if our inspection finds only a minor area that looks suspect and moisture levels are brought down quickly, we can often handle cleaning and antimicrobial treatment as part of normal water mitigation. If we see broader contamination, we explain why a separate mold assessment is in your best interest and help you take that step.
For homeowners, a practical rule is: if you can see widespread growth or smell strong musty odors, don’t ignore it. Call a restoration company and ask specifically whether your situation likely requires a licensed mold consultant under your state’s rules.
What a Clear, Honest Restoration Estimate Should Include
One of Susan’s biggest frustrations was the lack of clear pricing. She was hearing, “We can’t give you line items,” and, “We’ll charge this much now and more later,” with no real explanation. That’s not how we operate, and we don’t think it should be how anyone operates.
When we prepare an estimate, we walk you through it line by line. A solid, transparent estimate for a leak like this should generally include:
- Inspection and moisture mapping: How we’ll locate all affected areas, not just the obvious stain.
- Containment and protection: Plastic barriers, floor protection, dust control, and how we’ll protect the rest of your home.
- Demolition scope: Exactly how much ceiling, drywall, insulation, or flooring we may need to remove and why.
- Drying plan: Number and type of fans/dehumidifiers, expected drying time, and how often we’ll monitor.
- Cleaning and antimicrobial treatment: What we’ll clean, what products we’ll use, and where.
- Rebuild ballpark (if we handle it): Even if we can’t give a final finish selection price on day one, we can usually provide a reasonable range for putting drywall, texture, and paint back.
We always encourage homeowners to ask for:
- A written, itemized estimate rather than a lump sum with no detail.
- Clarification on “emergency” vs. “non-emergency” work, so you know what needs to happen now and what can wait.
- Confirmation on insurance. Ask whether the contractor works with insurance carriers and how billing would be handled if you file a claim.
When to Call a Restoration Company — and What We Do for You
Homeowners sometimes hesitate to call us because they’re not sure if their issue is “big enough.” With an upstairs toilet leak, we’d rather hear from you sooner than later — even if it turns out to be minor.
Here’s how we typically help in a case like Susan’s:
- We schedule an on-site inspection and let you know whether we’re sending a technician (for immediate mitigation) or an estimator (for a detailed quote).
- We perform moisture readings and visual checks in the bathroom, the ceiling below, and nearby walls to understand the full picture.
- We explain, in plain language, what truly needs to be done now (for example, opening up a small area to release trapped moisture) and what can reasonably wait.
- We provide a written, itemized estimate so you can compare it clearly with any others.
Our goal is to be the calm voice in the middle of the chaos — to take the fear and guesswork out of the process. We’ll tell you if it’s something small that can be handled with minimal work, and we’ll also be honest if the damage is more extensive and needs a fuller mitigation and rebuild plan.
Practical Takeaways If Your Upstairs Toilet Is Leaking
If you’re dealing with something similar to what Susan went through, here are the key steps we recommend:
- Shut off water to the toilet and don’t use it until the wax ring is replaced.
- Protect the area below with covers and move belongings out of harm’s way.
- Document everything with photos and notes — dates, what you saw, what you did.
- Call a restoration company early for an inspection and moisture mapping.
- Ask for a clear, line-item estimate and an explanation of any mold-related concerns.
- Don’t let anyone pressure you into signing on the spot without understanding the scope and costs.
Water damage from an upstairs toilet leak can feel intimidating, but with the right information and a restoration team that explains each step, it becomes a manageable repair instead of a nightmare. If you’re unsure how serious your situation is, we’re always happy to take a look, give you an honest assessment, and help you decide what should happen next.